The Quik! Form Viewer is the primary way users can fill out Quik! HTML forms. The viewer contains properties that expose the various HTML attributes that you can configure at a customer/partner level. Using the Quik! Forms Engine, you can change the title of the page, meta tags, buttons, the logo displayed to the user, the page content and the styles. See images below for a description of all parts of the Quik! Form Viewer.
...
Put your logo on the forms by specifying the URL or relative reference to your logo file. Your logo must be 150 pixels wide and 65 pixels high. Set the HTMLLogoPath and HTMLLogoAltText property.
Instructions
The text on the top of form viewer can be changed to your own text. Be careful not to use more text than will fit on the page to avoid page size and style issues. Set the HTMLMainInstruction and HTMLMinorInstruction properties.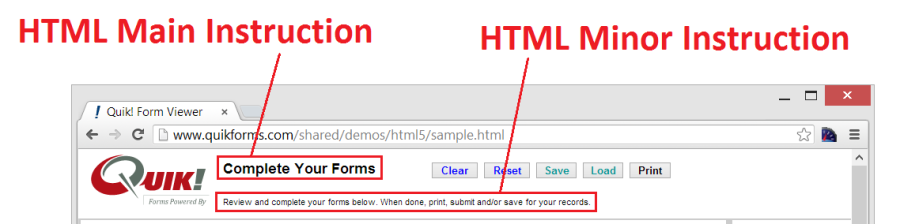
Buttons
Each button on the form viewer can be hidden by setting their respective property. See below for a description of the purpose of every button that can be displayed. For more on configuring buttons in the Viewer, please see here.
...
Save: Saves the current version of the form either to a pre-configured location, or, if location is not provided, to user's local browser.
Load: Loads the saved version of the form for or user to continue to fill out.
Reset: Deletes field data that has been entered , when the form has been saved to the browser only. This button is hidden when RoutingRulesOn = TRUE.
Reset: Deletes field data that has been entered by the user. Pre-filled data will remain.
Clear: Deletes all field data that has been pre-filled or entered by the user.
Submit: Sends the form to a pre-configured URL data in value pair format to the SubmitURL (typically a location in your system/platform/application for further processing). Clicking the Submit button activates the also validates required fields if any are included on the form. In other words, forms may not be submitted to any location until the required fields are filled out.
Print: Exports and downloads the form as a PDF.
Edit: Launches the custom fields editor tool to build new fields on the form.
Sign: Launches the E-Signature pop-up for either SIGNiX, DocuSign, or Quik! Native E-Signature.
Email: Allows Allows the user to email the form (completed or not) to another party. Quik! only posts form data to the URL you provide. You must build the email service which actually sends the email to the recipient with the link to the form.
Note: By default the Submit button will NOT display unless a submit URL has been provided. The Save and Load buttons work together and are both hidden when the Save button is hidden. 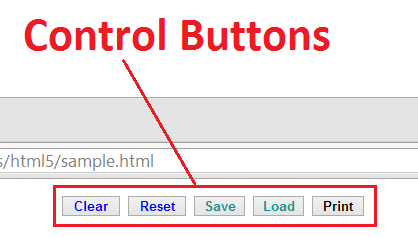
...
The Quik! Form Viewer footer can be modified as needed by setting the HTMLFooter property.
Cascading Styles
The styles incorporated into the Quik! Forms Viewer are integral to how the page is displayed, however you can modify the styles to create the effect you want (e.g. different border colors). Set the HTMLStyles, HTMLFieldFontColor and/or HTMLFooterStyle properties.
CAUTION: Changing the styles requires careful attention to detail and thorough testing of any changes in all supported browsers.
The default HTMLStyles value below:
"<style type=""text/css"" media=""all"">body,ul,li,p {padding:0;margin:0;border:0;} body {font-size:12px;font-family:helvetica;} span a {text-decoration:none;color:#aa0000;} #QFVwrapper {width:100%;background-color:red;} #header {position:absolute;z-index:1;top:0;left:0;width:100%;min-width:768px;height:88px;line-height:38px;padding-left:10px;color:#000;font-size:20px;text-align:left;border-bottom:2px solid #ccc;} #header a {color:#000;text-decoration:none;font-weight:bold;text-shadow:0 -1px 0 rgba(0,0,0,0.5);} #footer {position:absolute;z-index:2;bottom:0;left:0;width:100%;min-width:768px;height:30px;background-color:#fff;padding-left:10px;border-top:2px solid #ccc;} .tableheader {height: 90px;} #wrapper {position:absolute;z-index:1;top:90px;bottom:31px;left:0px;background:#ccc;overflow:auto;} #scroller {position:absolute;z-index:1;width:100%;padding:0;background:#ccc;-ms-touch-action:none;} #scroller ul {list-style:none;padding:0px;margin:0px;width:100%;text-align:left;border-bottom:0px solid #ccc;border-top:0px solid #ccc;border-left:3px solid #ccc;} .ie8 #scroller ul {list-style:none;padding:0px;margin:0px;width:100%;text-align:left;border-bottom:0px solid #ccc;border-top:0px solid #ccc;border-left:1px solid #ccc;} #scroller li {padding:0px;border-bottom:0px solid #ccc;border-top:2px solid #ccc;background-color:#ccc;} #navWrapper {position:absolute;z-index:3;top: 90px;left:625pt;-ms-touch-action:none;height:500px;width:150px;} #navPage{position:absolute;z-index:100;top:25px;overflow:auto;background-color:#cccccc;width:80pt;height:175pt;vertical-align:top;text-align:center;padding:1pt;clear:left;border-style:inset;border-width:1pt;border-color:#cccccc;} .ie8 #navPage{position:absolute;z-index:4;top:25px;overflow:auto;background-color:#cccccc;width:80pt;height:175pt;vertical-align:top;text-align:center;padding:0pt;clear:left;border-style:inset;border-width:1pt;border-color:#cccccc;} #navPage ul {list-style:none;padding:3px;margin:0px 0px 0px 10px;width:63pt;text-align:center;} .ie8 #navPage ul {list-style:none;padding:0px;margin:0px 0px 0px 10px;width:63pt;text-align:center;} #navPage a {text-decoration:none;} #navFormHeader{position:absolute;z-index:5;top:250px;} #navForm{position:absolute;z-index:100;top:298px;overflow:auto;background-color:#cccccc;width: 80pt;height:135pt;vertical-align:top;text-align: left;padding:1pt;clear:left;font-family:sans-serif;font-size:8pt;border-style:inset;border-width:1pt;border-color:#cccccc;-ms-touch-action: none;} .ie8 #navForm{position:absolute;z-index:6;top:298px;overflow:auto;background-color:#cccccc;width: 80pt;height:135pt;vertical-align:top;text-align: left;padding:0pt;clear:left;font-family:sans-serif;font-size:8pt;border-style:inset;border-width:1pt;border-color:#cccccc;-ms-touch-action: none;} #navForm ul {list-style:none;padding:3px;margin:0px;width:80pt;text-align:left;} .nonIE8 input[type=""checkbox""] {display:none;} .nonIE8 input[type=""checkbox""] + label span {display:inline-block;width:20px;height:20px;margin:-1px 4px 0 0;vertical-align:middle;cursor:pointer;} .nonIE8 input[type=""checkbox""]:checked + label span {background:url(https://www.quikforms.com/shared/images/quikformviewer/check_mark_black.gif) left top no-repeat;} .nonIE8 input[type=""radio""] {display:none;} .nonIE8 input[type=""radio""] + label span {display:inline-block;width:20px;height:20px;margin:-1px 4px 0 0;vertical-align:middle;cursor:pointer;} .nonIE8 input[type=""radio""]:checked + label span {background:url(https://www.quikforms.com/shared/images/quikformviewer/check_mark_black.gif) left top no-repeat;} input.itemBackgroundTransparent{background:url(https://www.quikforms.com/shared/images/quikformviewer/trans.gif) repeat;} input.itemPositionAbsolute{position:absolute;} input.itemBorderNone{border:none;} input.itemBorderSolid{border-style:solid;} input.itemBorderTransparent{border-color:transparent;} input.itemBorderWidth1{border-width:1pt;} input.itemVisible{visibility:visible;} input.itemHidden{visibility:hidden;} label.itemHidden{visibility:hidden;} input.itemBlue{color:Blue;} input.itemBackgroundWhite{background:#FFFFFF;} input.itemRequired{border-color:#FF0000;border-width:1pt 1pt 1pt 1pt;} span.MinorInstr{font:bold 10px Arial, sans-serif;vertical-align:top;padding-left:10px;} span.InstrError{font:bold 14px Arial, sans-serif;color:Red;vertical-align:top;} span.ItemError {font:bold 11px Arial, sans-serif;line-height: 1em;color:#FF0000;text-shadow: 1px 1px 1px #000000;background: url(https://www.quikforms.com/shared/images/quikformviewer/error.png) no-repeat 0 center;height:11px;padding:10px;display:none;top:3px;right:0;}</style>"
Other Form Viewer Settings
...
A unique feature of the Quik! Form Engine is the ability to add custom javascripts to the forms and extend your own customized functionality. For example, if you want to validate a field or cause events to fire when certain form fields are interacted with you could include a javascript file and set a javascript action to run. Set the CustomJavaFileIncludePath and CustomJavaScript properties.
Understanding Form Elements
...