![]()
How Do I Set Up Form Rules?
There's a number of ways to setup form rules within the Quik! Rules Management system. This page will cover a range of tutorials for various rule types.
Default Values & Prefilling Form Fields
Whether you are wanting to prepopulate a field with default data or precheck a form's checkbox, you can do this by giving a field a default value.
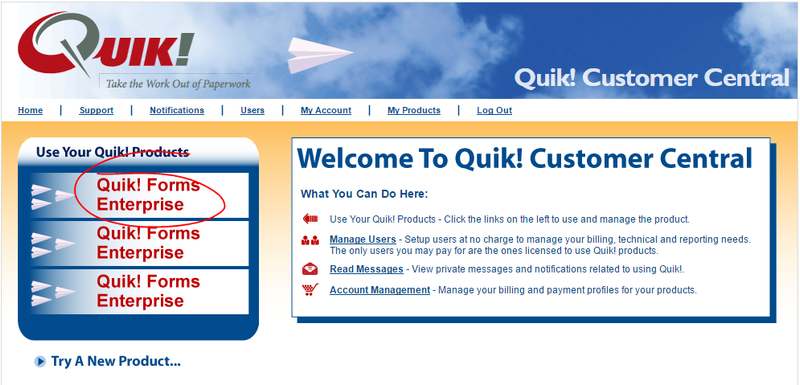
- Log into your Quik! account at:
- Once logged in, click the Quik! Forms Enterprise button
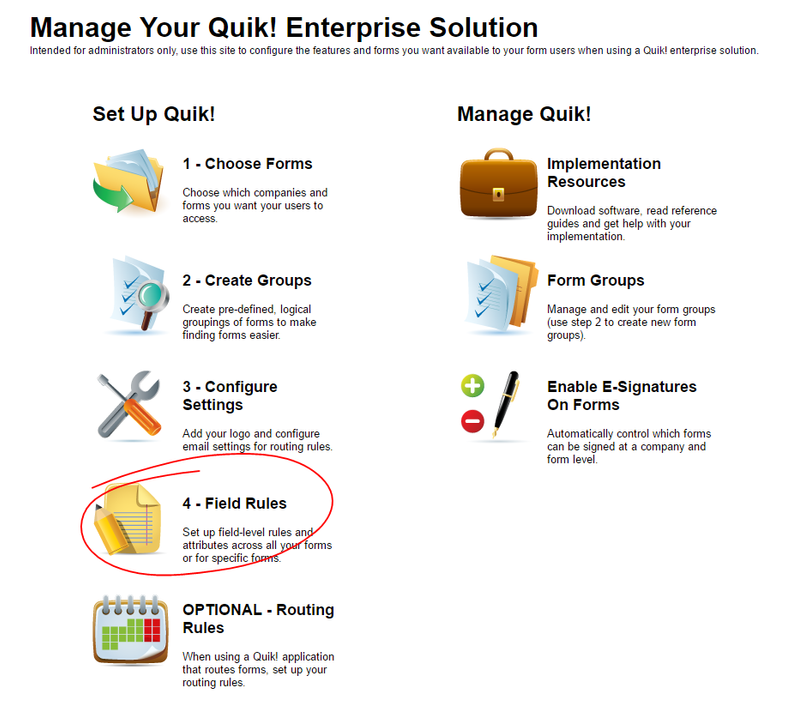
- Once arrived at the Enterprise Manager, scroll down the page and click section 4 - Field Rules
- At the Field Rules page, scroll down to the Add New Field Rules section
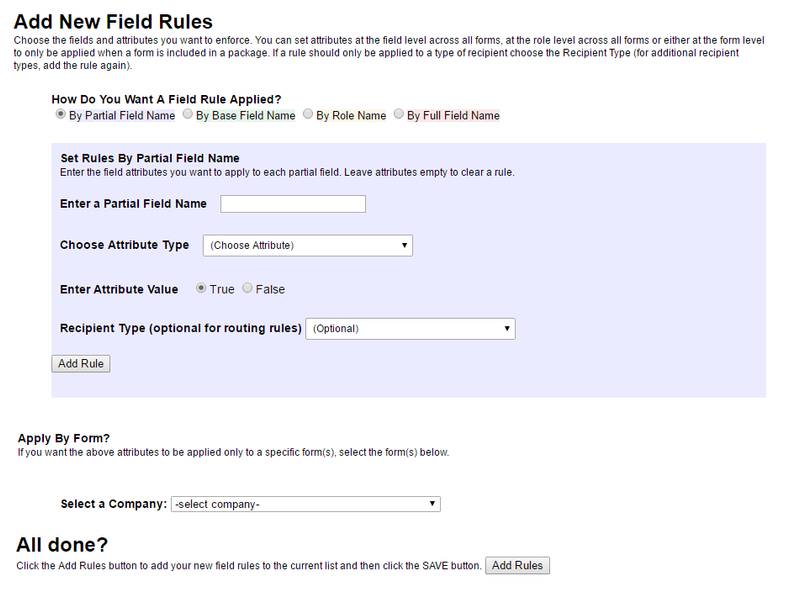
- Here we'll click the "By Full Field" radio button and the background will turn pink
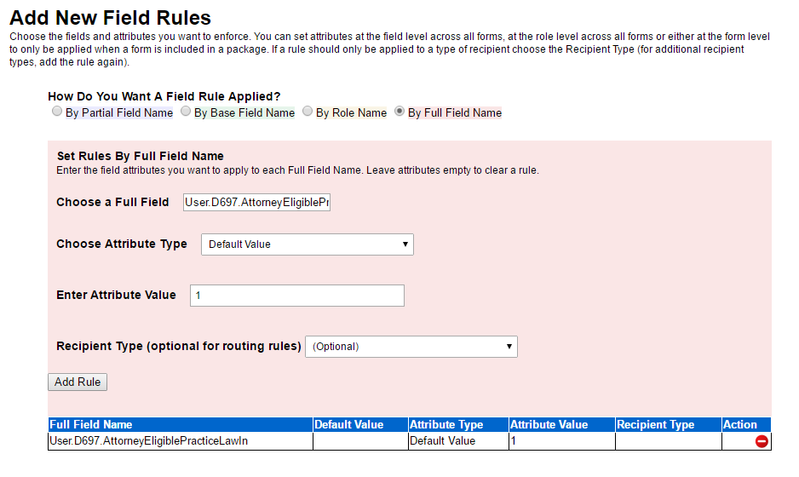
- Input the full field name into the "Choose a Full Field" section. This is the field on the form that will contain the default value. For additional help on locating the name of form fields, visit the Finding Field Names And Values On A Form page
- Next, select the behavior you'd like to apply to the field in the 'Choose Attribute Type' drop down. In this case, let's select the 'Default Value' option.
- In the box below (Enter Attribute Value) is where we'll input the value we'd like to the field to display. For additional help on locating a value for form fields, visit the Finding Field Names And Values On A Form page
- After all the selections and values are in place for adding a new field rule, click the 'Add Rule' button at the bottom. Below the clicked button will then display your newly created rule in a table row.
- Once the 'Add Rule' button has been clicked, we'll scroll down the page a little further to the Apply By Form section. This is where we'll make the rule apply to a specific form, rather than globally. If you want the rule to apply to all forms, you can skip this part.
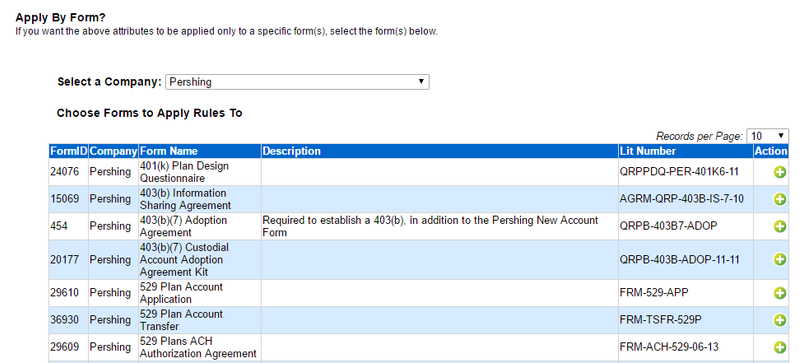
- First locate the company for who's library of forms we'll be using. In the sample above, we'll be using Pershing, but feel free to use your company's forms.
- The table of forms will display once a company has been selected. Go ahead and locate the form or forms you'd like to apply the rule to.
- Once you've found your form(s), click the green 'Plus' button in the right most 'Action' column.

- You'll see the form you've selected appear in a table below this section. Once you've added the form or forms you'd like to apply the rule to, click the 'Add Rules' button. This will commit the rule(s) into the system.

- After finalizing or committing the rule, it's recommended to refresh or reload the page.
- After reload, you'll see your newly added rule appear in the top Current Field Rules table
- The rule is now in the system, but we'll want to make one last change and that is to change its status from 'Test' to 'Active'. This can be done by adjusting the selection in the 'Status' dropdown.
- After the rule(s) have been changed to 'Active', click the 'SAVE' button below the table.
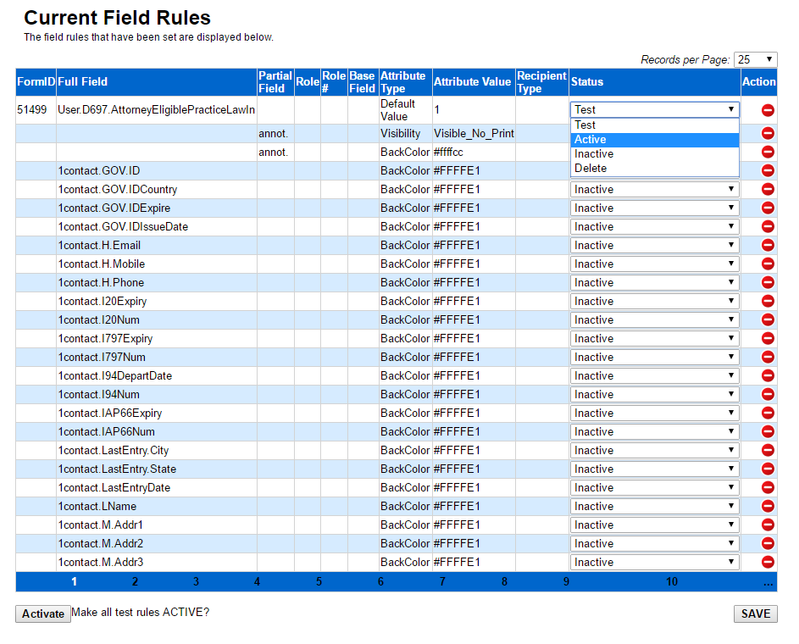
- Now check your form, you should now have the default value(s) appearing.
![]()
For help regarding Quik! Forms and the Quik! API
Email: support@quikforms.com | Phone: (877) 456-QUIK