![]()
How Do I Change the Company Logo on my Forms?
Changing the company logo which is displayed on your forms is easy. You can adjust it programmatically by configuring properties or through altering settings in your Quik! Customer Central account. We'll detail them both below.
Configuring Properties
HTMLLogoPath | Gets or sets the full URI path to the logo file Default Value: "logo.png" |
HTMLLogoAltText | Gets or sets the alternate text for the logo image Default Value: "Quik! Forms" |
Note: To avoid stretching/warping, your logo should be 150 pixels wide and 65 pixels high. Acceptable formats include: JPG, GIF, PNG.
Configuring Quik! Customer Central Account Settings
Below is several steps to help you make the change
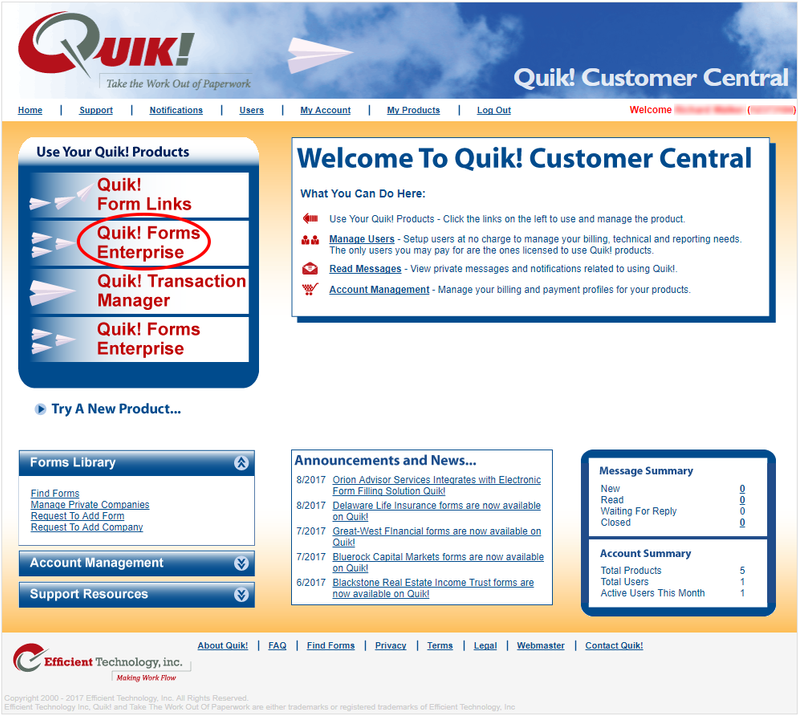
- First step is to log into Quik! Customer Central account. (Found here: qcc.quikforms.com)
- Next step is to click the Quik! Forms Enterprise link (Circled in red)
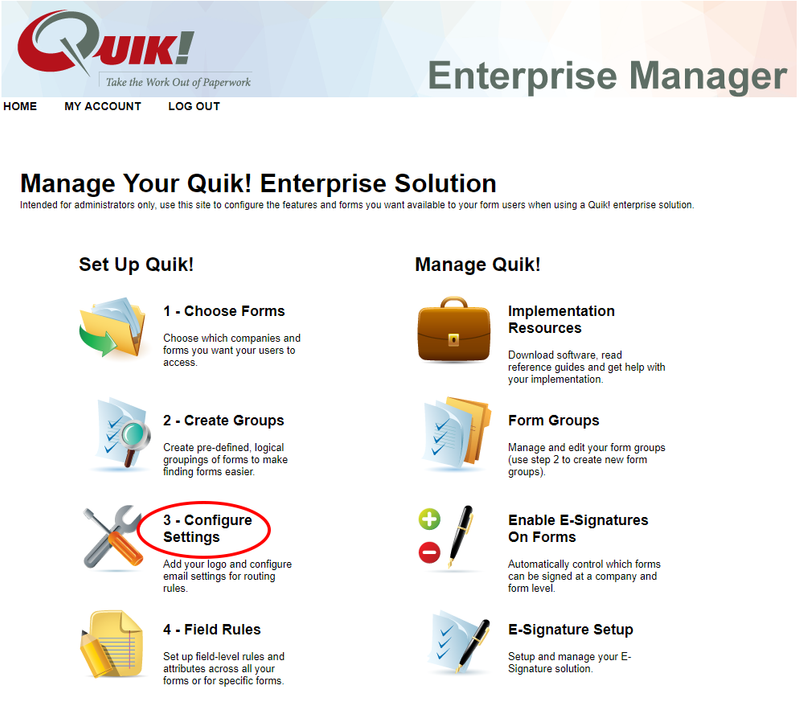
- Clicking this will launch the Quik! Forms Enterprise Manager
- Click 3 - Configure Settings section
- On this page, there's two ways to change how your logo is displayed on your forms.
- The first option is by uploading an image for Quik! to host. Click the 'Choose File' button and locate the image you'd like to use as your logo.
Note: To avoid stretching/warping, your logo should be 150 pixels wide and 65 pixels high. Acceptable formats include: JPG, GIF, PNG.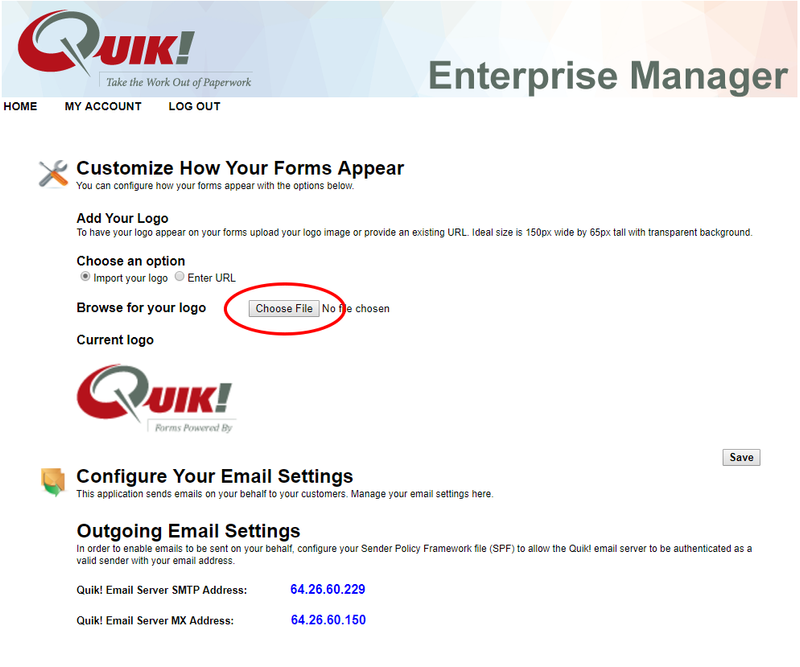
- The second option is linking a URL to where your logo image is being hosted.
Note: To avoid stretching/warping, your logo should be 150 pixels wide and 65 pixels high. Acceptable formats include: JPG, GIF, PNG.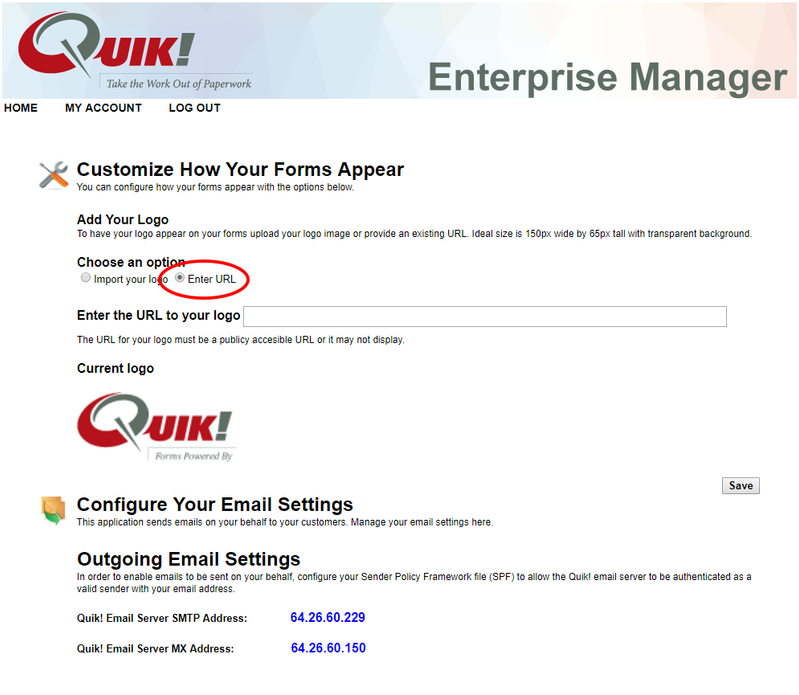
- Last step is to ensure you click the 'Save' button after making your changes.
- You're all set!
![]()
For help regarding Quik! Forms and the Quik! API
Email: support@quikforms.com | Phone: (877) 456-QUIK