![]()
Configuring Roles for Prefill
- Chad Bingham (Unlicensed)
- Austin Logie (Unlicensed)
When generating forms, customers have the option to prefill data on the form. In order to prefill data, customers must ensure that the correct value is added to the associated field. Quik! accomplishes this by assigning entities (typically people) to roles.
The Quik! sample website demonstrates one way this can be accomplished (as a reminder, the source code to the Quik! Sample Website is provided with all Sandbox accounts as a way to help set up your implementation and you are free to use as much as you would like for your own implementation). See the ChooseClients.aspx.cs file in the SampleWebsite folder in the Sandbox file set on how this can all be accomplished programmatically. Below is a screenshot from the "Clients" page of the sample website, and an explanation of its parts:
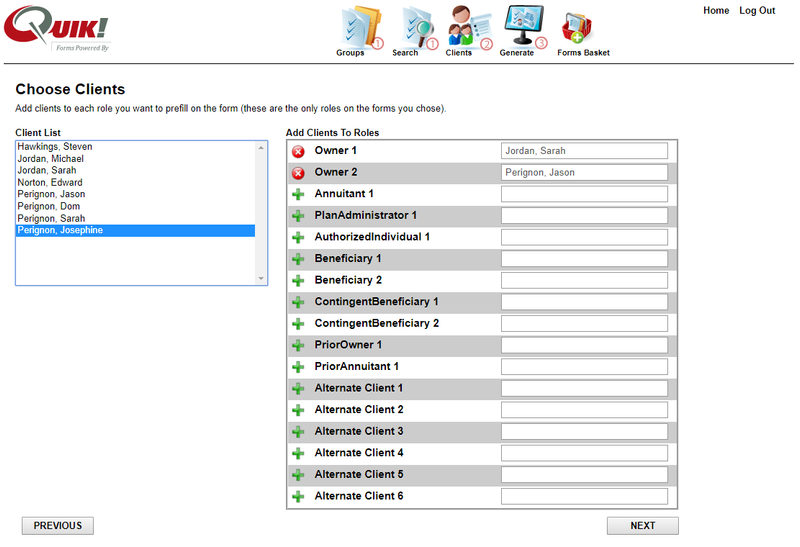
On the Client List window, a list of clients is displayed. In your implementation, this list would be pulled from a data source of client information such as a CRM or other database.
On the Add Clients To Roles window, users can assign people to roles. This list of roles is dynamically created based on the roles that the selected forms include. In other words, if you selected a form to assign clients to, and that form only has the roles of Owner 1 and Owner 2, then this window would only allow users to add 2 clients–one to Owner 1, and one to Owner 2.Too add a client, simply highlight their name in the Client List, and click the green 'plus' button to assign them to that role. To remove, simply click the red 'x' button. You may choose to prefill as many roles as you would like before generating the forms.
As stated above, please see the ChooseClients.aspx.cs file in the SampleWebsite folder in the Sandbox file set on how this can all be accomplished programmatically.
Related content
![]()
For help regarding Quik! Forms and the Quik! API
Email: support@quikforms.com | Phone: (877) 456-QUIK